Skip to content
Accessibility policy
Choosing a selection results in a full page refresh.
New: All Natural Lump Charcoal
Shop Now
Find a retailer
My Account
United States - English (USD $)
Denmark (DKK)
France (EUR)
Germany (EUR)
Netherlands (EUR)
Norway (NOR)
Spain (EUR)
Sweden (SEK)
United Kingdom (GBP)
United States - English (USD)
Grills
Griddles
Accessories
Parts
Explore
Sale
Close menu
Close search
SEARCH IN:
All
Products
Recipes and Posts
Support Pages
View All
View All
Searching..
Close search
View All Grills
Grill Type
Charcoal Grills
Dual Fuel Grills
AKORN Kamado
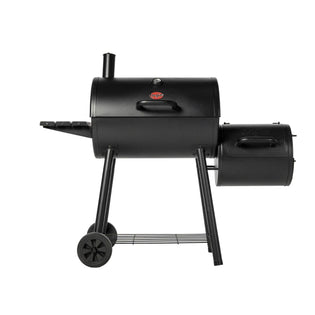
Offset Smokers
Portable
View All Griddles
List
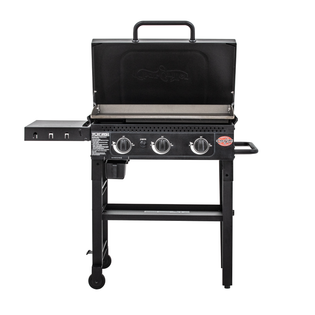
Flat Iron® Portable 17-inch Gas Griddle
Flat Iron® Premium Gas Griddle
Flat Iron® Gas Griddle with Lid
Grill Covers
Apparel
Shop All Accessories
Recipes
Grilling Tips
Community
List
Sauced and No Sauce Spare Ribs
Pulled Pork n' Bacon Cheesy Sliders
Smoked Pulled Leg of Lamb
Back to explore
View All Recipes
Category
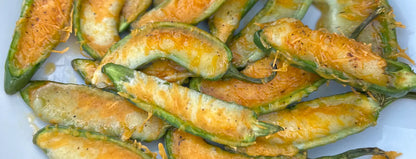
Appetizer
Beef
Breakfast
Pork
Poultry
Seafood
Sides
Method
Baked
Fried
Griddled
Roasted
Seared
Smoked
Filters
All
Products
Recipes
Support Pages
View All
View All
Grills
View All Grills
Charcoal Grills
Dual Fuel Grills
AKORN Kamado
Offset Smokers
Portable
Griddles
Accessories
Parts
Explore
Recipes
Grilling Tips
Community
Sale
Find a Retailer
Login / Sign up
United States - English (USD $)
Denmark (DKK)
France (EUR)
Germany (EUR)
Netherlands (EUR)
Norway (NOK)
Spain (EUR)
Sweden (SEK)
United Kingdom (GBP)
United States - English (USD)
You'll Never Want Store Bought Again!
Smoked Beef Jerky on an Offset Smoker
GET RECIPE
GET RECIPE
Filters
Clear Filters
Filter By
Close
Filter By
Clear Filters
Food Type
Appetizer
Beef
Breakfast
Dessert
Other
Pizza
Pork
Poultry
Sauces and Rubs
Seafood
Sides
Cooking Style
Baked
Boiled
Fried
Griddled
Grilled
Other
Roasted
Seared
Smoked
Cook Time
0 - 30 min
30 - 60 min
1 - 2 hours
3 - 4 hours
5 - 6 hours
6+ hours
Skill Level
1 Beginner
2 Intermediate
3 Advanced
4 Master
Show Results
Show Filters
Hide Filters
BBQ Glazed Salmon with Fresh Peach Salsa
Skill:
Beginner
Nashville Hot Chicken Sliders
Skill:
Intermediate
Reverse Seared Tri-Tip
Skill:
Beginner
Grilled Skirt Steak and Crispy Potatoes with Giardiniera
Skill:
Beginner
Bone Marrow Encrusted Flank Steak
Skill:
Intermediate
Kettle Grilled Creole Chicken Wings
Cook Time:
0 - 30 min
0 to 30 min"
Skill:
Beginner
Charred Broccoli Salad
Skill:
Beginner
Char-Grilled Lobsters with Cowboy Butter
Skill:
Beginner
Honey Sriracha Smoked Ribs
Skill:
Beginner
1
1
2
2
3
3
4
4
...
41
41
Show Me More
Show Me More
Purchase options
Select a purchase option to pre order this product
Countdown header
Countdown message
DAYS
:
HRS
:
MINS
:
SECS
 Flat Iron® Portable 17-inch Gas Griddle
 Flat Iron® Premium Gas Griddle
 Flat Iron® Gas Griddle with Lid
 Sauced and No Sauce Spare Ribs
 Pulled Pork n' Bacon Cheesy Sliders
 Smoked Pulled Leg of Lamb