Flat Iron® Portable 17-inch Gas Griddle
 Flat Iron® Premium Gas Griddle
 Flat Iron® Gas Griddle with Lid


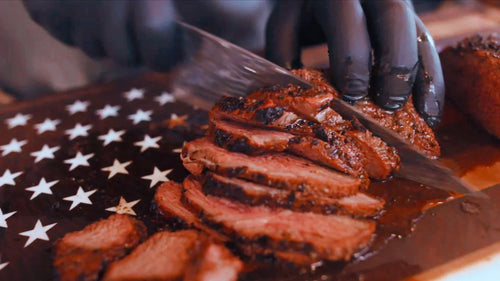
 Reverse Seared Ribeye
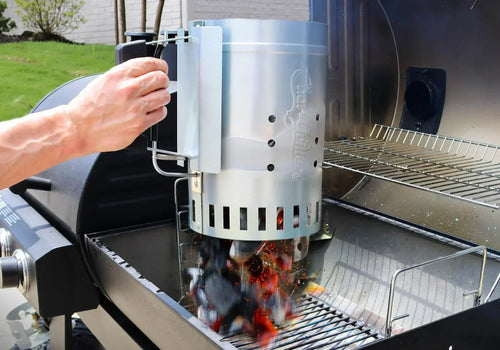
 Accessory Spotlight
 Smokey Texan Raspberry Chipotle Stuffed Burger


Are you inspired by your favorite grillfluencer’s content? Or do you just want to show off your boss-level BBQ skills? We love to see all the mouthwatering cooks from #TeamCharGriller no matter the meal! Whether you want to take better pictures to develop consistency across your social media, to gain more followers or for your own archives, we’ve got some tips to make it happen. You don’t need a professional camera or lighting set up. As long as you’ve got a smartphone, you’re ready to get started.
1. Lighting
Lighting is perhaps the most important step when it comes to taking great photos of your cook. Always use natural lighting when possible. Whether it’s taking a few steps to the left to let the sun shine into your shot or opening the blinds while in your house, it will make a difference. Avoid using flash...ever. It will surely take away from the authenticity and appeal of your photo, oftentimes causing the picture to look to white, blue or even distorted.
2. Don’t Zoom
When taking pictures of your BBQ, NEVER use the zoom feature because you will lose valuable photo quality. This will cause the final product to look blurry or grainy. If you want a closer shot of your cook, simply move closer, but avoid moving too close. Allow your audience to actually see what it is that you’ve prepared. Don’t leave them guessing with awkward close-ups of the bark or skin.
3. “Burping the Hood”
Find yourself wanting to take an epic opening shot of your grill, but the smoke clouds your camera? Chances are your audience can’t actually see your brisket, pork butt or chicken and your picture or video won’t actually do it justice. Our ambassador ,Certified Creole BBQ, in his BBQ Tips Blog, recommends “burping [your] hood before opening the grill.
“Double pumping the grill hood before opening it allows the smoke that will be released to roll upward into the air and prevents it from getting into your face or your electronic device if you’re capturing the moment for content.”
4. Angles
Angles are important. Choose them wisely. Just like everyone has their “best side” when posing for photos, you’ve got to find the “best side” of your cook. Which angle makes your cook look most appealing. Would it be a photo that you’d like or comment on if someone else posted it? Whichever angle you choose, be sure to keep our previous tips in mind. Is the lighting good? Is it too close or too far? Can we actually see what you’ve prepared without reading the caption? If you’re unsure, you can never go wrong with a nice overhead/bird’s eye view shot.
5. Background
Be mindful of your background. Also be meaningful. If you want to establish a farm-to-table theme for your social media, then you might consider a consistent wood table background or if you’d like to establish a modern or minimalist theme, consider white/bright backgrounds or white plating. Most relevant, if you’d like to establish your stature as an avid backyard BBQ lover, then consider taking the majority of your photos outside, perhaps on a cutting board or outdoor scenery. Get creative! Most importantly be sure there aren’t distracting things in the background like trash, unnecessary clutter or things that might take away from your photo. Keep the focus on the BBQ!
6. Focus
If you have a smartphone, chances are it has a focus feature on the camera. Wherever your meal is in the shot, simply tap your food on the screen to show your phone where it should focus. It will make your food look even more clarified from the background, slightly blurring things around it, creating a more professional-looking product.
7. Experiment
Ultimately, your photos or social media are a representation of you. Be sure to get creative and add your own flair, your own signature. Experiment with the way you arrange your meat after slicing or play with the background that you use for each photo. The options are endless.
8. Filters
Use filters and editing sparingly. A Negative or Black & White filter might make your cook look a lot less appealing. If you do choose to edit, do so to bring out the colors to make things look more bright and vibrant. Try to keep it as authentic as possible. If your lighting, angles, background and focus are all good, then you won’t have much to worry about!
We hope this blog post was helpful in helping you take steps toward taking quality photos of your BBQ! You’re on your way to becoming a grillfluencer in your own right and we’re excited to see it. As always, if you’re uploading to social media, be sure to tag us and use #CharGriller and #TeamCharGriller for a chance to be featured!