Ensure Grill Protection and Longevity
Regularly seasoning your grill ensures that it stays in top condition and continues to deliver mouthwatering, perfectly grilled dishes for years to come. Don't overlook this essential step in grill maintenance for a superior grilling experience.
Whether you bought a brand new grill or rolling one out of storage for the summer, it is a necessity to properly season the interior.
Thoroughly seasoning your grill or smoker will ensure protection and longevity for your unit, make it easier to clean, and help your food taste better. In this blog post, we’ll give you a step-by-step guide and tips to seasoning or reseasoning your Char-Griller.
Charcoal Grill Prep: How to Prep & Maintain Charcoal
If you have a charcoal grill, you will need to prepare your charcoals before the following steps. In order to allow the coating you apply to your grill to set in properly, you will need to heat it up, so before you begin the process, get your coals prepared. Fill your chimney with coals and light them so that they’re fully ashed over by the time you need them.
Watch the video below for a step-by-step on how to prep and maintain charcoal for a low and slow cook.
Grill Seasoning Steps
1. Choose Your “Season Sauce”
Many grill masters swear by using bacon grease, some use vegetable oil or olive oil. Other people will make a mixture of multiple types. Whichever you choose, this will serve as your “Season Sauce”. Get it ready along with a brush you will use to apply it to the grill. A new paint brush will suffice.
2. Clear Out Your Grill/Smoker
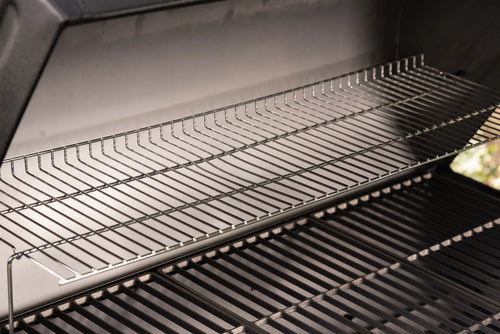
Remove the grill grates and any other components that are inside of the grill and the Side Fire Box if you have one. Keep them on hand as you’ll add them back in one by one as you get everything coated.
3. Coat EVERYTHING!
Some folks will only season the grates inside the grill or smoker, but we recommend seasoning the entire interior. Dipping your brush into the “Season Sauce”, begin to coat the entire inside of the barrel including the lid and nuts and bolts! Be sure to layer on a decent amount and try to get every crevice. If you have a Side Fire Box, be sure to coat the entire interior of that as well.
Begin to add the grill components back inside one by one, making sure to coat them completely. Be sure to completely coat both sides of the grill grates.
4. Get Your Grill/Smoker Fired Up!
Now’s the time to get your grill fired up. If you have a gas grill, heat it to between 250-275 degrees. If you have a charcoal grill, nows the time to use those coals you lit at the beginning. Dump them into your grill or Side Fire Box and close the lid. (Optionally, you can add wood to the coals.)
Get your grill up to 250-275 degrees and keep it there. This will help the seasoning set it in. Let it sit at this temperature for about 2 hours. You should notice the grill smoking and the previously shiny, oiled interior will turn to a dark brown or bronze. After two hours, coat everything one more time before letting it bake for an additional hour then letting it cool down.
5. Maintain the Seasoning.
After this initial seasoning, maintain it by lightly coating oil after each use to prevent rusting and to keep the non-stick surfaces intact.
Once your grill is seasoned, it’ll make your day-to-day grilling more stress-free and extend the lifetime of your Char-Griller Grill.

 Flat Iron® Portable 17-inch Gas Griddle
 Flat Iron® Premium Gas Griddle
 Flat Iron® Gas Griddle with Lid


 Sauced and No Sauce Spare Ribs
 Pulled Pork n' Bacon Cheesy Sliders
 Smoked Pulled Leg of Lamb


