Flat Iron® Portable 17-inch Gas Griddle
 Flat Iron® Premium Gas Griddle
 Flat Iron® Gas Griddle with Lid


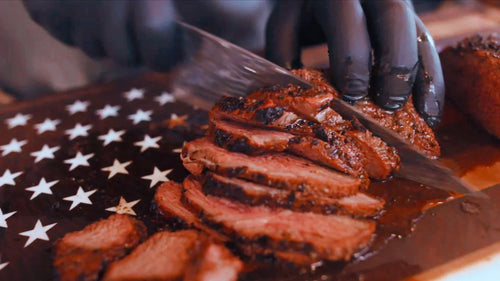
 Cheddar Cheese Stuffed Burgers
 Accessory Spotlight
 Reverse Seared Ribeye


Char-Griller Ambassador Aubrey Johansen talks searing.
Today we’re talking grill marks, how to get the best sear!
When I’m pulling anything off the grill, I want it to have beautiful char-marks, diamonds, a cross hatch, whatever you like, but some line of sear. This means flavor! Getting the perfect sear on the grill doesn’t have to be hard, and here are a few of my tried and true tips to help you get it mastered at home.
The items you will need for this “How To” are:
- Char-Griller Grill
- Grill Brush
- Tongs
- Protein or Veggie of choice
- Paper Towel
- Salt & Pepper
Step One: Let the meat come to room temperature. When cooking protein in general, we want our meat to come to room temperature for about 20-30 minutes before cooking, that way the meat can cook evenly and allows the meat a chance to not stick to the grates. Cold meat and hot grates equal major sticking. Set yourself up for success by allowing the meat to come to room temperature while you prep the rest of your ingredients.
Step Two: Preheat your grill! Think of preheating your grill the way you would your oven, or a skillet. You wouldn’t put a steak in a cold pan expecting to get a golden-brown crust, right? Give the grill 20 minutes to preheat at high heat, giving the Char-Griller Cast Iron Grates a chance to get screaming hot, which will give us those gorgeous sear marks we are after. Be sure to brush your grill grates clean before and after every grill experience. Keeping them clean also keeps us in the non-stick zone.
Step Three: Pat the meat dry. Excess moisture creates a barrier between the meat and the hot grill grates. Moisture keeps the sear out, and if you just simply dab your protein with a paper towel before seasoning, it’ll give us a dry surface area that we are after. If you’re using a marinade, try to blot off any excess oil or liquid from the surface, before applying salt and pepper to grill.
Step Four: Wait to season. This step ties in with number three. After you blot dry the protein, apply salt right before adding to the grill. Letting salt sit on meat will pull moisture to the surface, which is what we don’t want, so waiting to season until you’re ready to start grilling will help you get that crust! I like to keep salt and pepper right at my grill station, so It can be the very last thing I do before starting the cook.
Now that we have the prep handled, it’s time to grill. Searing comes down to letting the meat do its thing, aka don’t touch it! Letting the meat sit still in one position gives it the most contact time with the hot grates, giving us that gorgeous sear mark. Then, we can flip, or rotate counterclockwise to get the next mark, creating a diamond sear. If you’re constantly moving the protein around, you eliminate the chance for it to have enough contact time with the hot surface to create the sear.
So, if you’re a serial mover, set a timer for your proteins, whatever the cook time is, divide that by four, and that’s how many times you can move the meat. I start the meat at 3 o’clock angle. 4-5 minutes later, I rotate it to 10 o’clock. 4-5 minutes later, I flip at the 3 o’clock angle again, and then 4-5 minutes later, I rotate to the final 10 o’clock. Feel free to change the cook times per whatever you’re grilling, but that method should help!
Now that you’re a sear master, we cannot wait to see those gorgeous grill marks! Be sure to share them with us on social, and what tip helped you the most! Keep your eyes peeled for a recipe to come featuring these tips and tricks! Happy Grilling.