Auto-Kamado Frequently Asked Questions:
Prepping and Setting Up
I just got my grill and I have questions about assembly/missing or damaged parts in the box
Please contact us regarding any missing/damaged parts.
Before you fill out the warranty form, make sure you register your grill.
For any other questions regarding assembly or additional help with the AKORN Auto-Kamado, please contact customer service using the chat box in the lower right corner.
Why do I need to season my new grill?
Seasoning your grill helps to burn off any protective oils/dust/etc. left over from the manufacturing process. More importantly, this helps to protect your grill from the elements and allows for easier/quicker cleanup after each cook.
I assembled my grill and it has protective natural oils etc., on its surfaces, how do I get it ready for my first cook?
Before you use your grill, you must burn off any factory applied natural oils, dust, leftover packaging debris etc. This important step is normal for all new grills and will help ensure you avoid unnatural flavors and promote a clean cooking area.
Note: Make sure to remove all the packaging materials before the first burn in. Check inside the grill and inside the hopper to ensure that all Styrofoam and other packaging materials have been removed. There is a protective covering on the hopper fire bricks that will disintegrate / burn off during the seasoning process and there is no need to remove it.
1. Add charcoal on the fire grate (approximately 2-3 pounds of lump charcoal).
2. Follow the lighting instructions found in your Owner's Manual and then set the temperature to 350°F.
3. Once up to temperature, keep set temperature for 60 minutes.
4. After holding temperature for 60 minutes, turn grill off and allow to completely cool.
5. Season your grill (see FAQ - "How and when do I season my grill?").
How and when do I season my grill?
After the initial burn, it is time to season your grill. This will help protect your grill surfaces over time.
1. Once your grill has cooled, use a paper towel to apply a light coat of your favorite high smoke point oil like grapeseed oil to the cooking grates, warming rack and the inside of the lid and body.
2. Prepare approx. 2-3 lbs. of lump charcoal on the fire grate (approximately 50-60 briquettes).
3. Follow the lighting instructions, set the temperature to 350°F and run your grill for 20 minutes.
4. Turn the grill off and allow to completely cool.
5. Repeat steps 1-4 two more times.
6. To protect your grill, we recommend re-seasoning your grill twice per year.
I ordered my grill from Lowe's and it arrived damaged. What do I do?
First, contact us via our Contact Form. In most cases, we can provide the needed replacement parts. If the grill is damaged to the point of being unusable, follow the steps below. These steps also apply in the case of any damage that happens during shipping. In most cases, you will get a discount from Lowe's.
1. Grill is received damaged after ordering from Lowes.com to home
2. Have your order number ready and call 1-800-445-6937, the Lowe's customer care number.
3. Explain to Lowe's that you received a damaged grill.
4. Lowe's will begin the process of determining what to do, which is on a case by case basis.
5. If there is a possibility for a reship, it normally takes 28 days total to process. 14 days for Lowe's and 14 days for the financial institution to process refund.
Ignition
How much charcoal should I use?
We recommend you only use enough charcoal for the expected cook time. This will depend on cook temperature, type of fuel, outdoor temperature/humidity, and other factors.
For low & slow (200-250 F), or Hot & fast (375 - 450 F) indirect heat use approximately 1-3 lbs. of lump charcoal to build fire in the center of the fire grate. When coals ignite, close lid, and begin to regulate temp with controller.
For high temp searing & grilling (325-700 F) direct heat use approximately 2-3 lbs. of lump charcoal to build a fire in the center of the fire grate. When coals ignite, close lid, and begin to regulate temp with controller.
Can I use lighter fluid to start the charcoal?
Do not use gasoline, kerosene, lighter fluid, or alcohol for lighting charcoal. Use of any of these or similar products could cause an explosion leading to severe injury.
Do not use instant or match-light style of charcoal briquettes. Use of ignition accelerants voids the warranty.
For best performance, we recommend hardwood charcoal briquettes, standard charcoal briquettes or lump charcoal.
What kind of firestarter should I use?
We recommend using a tumbleweed or fire cube style of fire starter for igniting your grill.
NOTE: Do not use gasoline, kerosene, lighter fluid, alcohol for lighting charcoal. Use of any of these or similar products could cause an explosion leading to severe injury. Do not use instant or match-light style of charcoal briquettes. Use of these ignition accelerants voids the warranty.
Why is my fire going out?
Ignition first requires 3-5 minutes of charcoal activation from the open flame of a Firestarter. Stack 1-3 lbs. of lump charcoal (50-60 briquettes. into a pyramid in the center of the fire grate. Open top damper and fan cover. Light the coals using 1-2 fire starters and leave the lid open for 3-5 minutes to get the fire started. Close the lid and turn on grill controller to set all desired temperatures and timers.
Why is the controller not working/fan not turning on/grill not starting?
Check the following:
1. The power supply connection is plugged securely into the controller.
2. The power supply is plugged into a working outlet.
3. The controller is powered ON.
4. The top damper and fan cover are open.
5. Ensure you are allowing 3-5 minutes of charcoal activation from the open flame of a fire starter before powering on the controller.
Why is my grill not warming up even when the fan is on?
If the controller is powered on and the charcoal is ignited, heat shield is removed, ensure the top damper is open and the fan cover has been opened.
How long does my grill take to get to temperature?
Your grill will typically reach the desired temperature within 15 minutes. But many factors affect how long the grill grates and other metal surfaces will reach your desired temperature. This includes outside temperature / humidity, fuel type, fuel moisture content, among others.
When preparing your meal, we recommend allowing 20-30 minutes before beginning your cook. As you learn your product, your prep time will adapt to your preferred fuel type and local climate.
Why is there so much smoke during start-up?
Any time you cook with charcoal, it is normal for heavy smoke when first ignited. After fuel activation, the smoke will change to a light thin smoke, indicating your grill is ready to cook.
Using AKORN Auto-Kamado
How do I cook with wood chips?
Pre-soak wood chips for 35 minutes. Soak chunks for 1 hour and 30 minutes, or until the wood is completely saturated. After the grill has reached the desired temperature, sprinkle two handfuls of soaked wood chips or chunks over lit charcoals. Allow the chips to smoke by closing the lid. You can begin cooking after a few minutes and more soaked chips may be added to the fire later if necessary.
Why is my grill temp slightly higher/lower than the set temp?
The controller powers the fan to add air to the charcoal and increase the temperature of the grill. Due to natural heating and cooling cycles, the grill will slowly alternate between higher and lower temperatures. These cycles typically exhibit less than 5% variance at any time and will not affect the long term cook performance.
My grill is getting much hotter than the set temperature. What is going on?
This would likely be due to the vent being open too far, too much charcoal being activated, or the fan being on manual.
Why doesn't the temperature readout on the controller match a particular point being measured inside the grill?
The controller uses algorithmic logic to estimate the average temperature in the middle of the cooking area, not any specific temp probe point.
What happens to my grill temperature when I open the lid?
When you open the lid, the cooking surface will cool, and the controller will attempt to maintain your set temperature. Opening the smoking chamber will extend cooking time. The more you keep the lid closed, the better the cooking performance.
How do I set the damper?
Why does the grill burn through charcoal faster than expected?
One of the largest factors in burn performance is outdoor temperature, colder outdoor temperatures will result in faster fuel consumption. Cooking at higher temperatures and frequent opening of the lid will also increase charcoal usage. Do not use accelerants or match lit charcoal. Finally, brands of charcoal vary in quality, density and material make up, resulting in differences of performance. For optimal performance, we recommend a natural hardwood briquette from a trusted fuel brand.
How long will my grill take to cool down?
To extinguish the fire after a cook, it is important to eliminate all sources of oxygen that your fuel can use to burn. First, turn the controller OFF and unplug your grill. Next, close the grill body lid, damper and fan cover allowing the fire to suffocate. Do not store or cover the grill until it has completely cooled. Depending on your earlier set temperature, this could take a couple to several hours.
Can I adjust the cook temperature during operation?
Yes, first press the grill temperature button. Then, rotate the control dial to the desired temperature. Finally, press grill temp button again to set desired grill temperature target.
Can I adjust the fan speed?
Yes, first press fan button. Then, rotate the control dial (fan starts in AUTO mode and can be adjusted from 0 to 100). Finally, press fan button or control dial to set. Press and hold fan button to return to AUTO.
Cleaning Up
How often should I empty the hopper ash pan?
Ash absorbs moisture which causes corrosion. We highly recommend you empty your ash pan after every cook. Charcoal and ashes left inside the ash pan may reduce the life of your grill.
How often should I clean my grill?
When finished cooking, clean your grates, and lightly coat with the high smoke point oil of your choice like grapeseed oil. This helps to both prolong the life of the grill and ensure it is ready to use the next time you fire it up. Once your grill is completely cool, empty your ash pan, recommended after every use. Only empty your ashes into a metal container and cover with water to ensure there are no lit coals.
How do I store my grill?
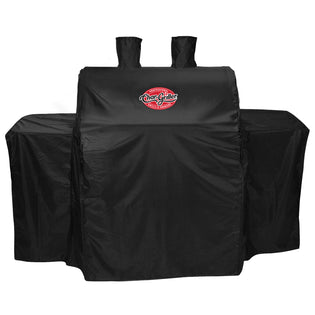
Extend the life of your grill by using a custom Char-Griller cover to protect your grill from dust, wind, and rain. Between use, we recommend storing your grill in a covered location to protect from sun and water. Find grill covers and accessories.
Other AKORN Auto-Kamado Questions
Does my grill have a warranty?
Yes, all Char-Griller grills come with a 1-year warranty on defective parts as well as a 5-year rust through / burn through warranty on the grill lid and body. The warranty form is on our website at Char-Griller Warranty. Grill registration is required for warranty service. Register your grill. Please be prepared to provide a copy of your receipt and the serial number located on the back of your grill body.
I have followed the instructions and FAQ and I still have questions, where can I get more help?
Please contact Char-Griller customer service using the chat box in the lower right corner
General Troubleshooting
Why is my grill not turning on?
Press the power buttonon the controller to verify. If controller will not turn on go to next step.
Verify controller is plugged into an outlet and that the power cord is securely plugged into the digital controller wiring harness.
Verify power at the electrical outlet. If the power cord is connected to a GFCI (ground fault circuit interrupter), check and reset if necessary.
If power is working at the outlet, please contact Char-Griller customer service via our Contact Form.
Why is the fan not running?
The grill temperature has reached its temperature goal.
The fan has been disconnected from the controller.
The fan has been disconnected from the wiring harness.
Why is the controller temperature not reading correctly?
Check if the main heat sensor inside the grill is dirty. Clean if necessary.
Check that the main heat sensor is fully plugged in.
Digital controller has a built-in algorithm that will approximate the grill temperature at the center of the grill grates, not at heat sensor. This may vary due to various conditions such as using the heat deflector, fuel type, weather conditions, etc.
Why is the temperature of my grill fluctuating?
Temperature fluctuations are normal. Any significant fluctuation could be the result of wind, air temperatures, improper use, or lack of grill maintenance.
If temperature overshoots the desired setting, pause the controller and open the grill lid to allow temperature to decrease.
Why is my grill slow to heat up?
Allow 20-30 minutes for temperature to equalize.
Weather conditions are humid or wet.
Charcoal has been used before.
Check if grill lid is open.
Check if fan is running. If fan is not running see "Why is the fan not running?"
Why is there excessive smoke leaking from the lid?
Check if the lid is full closed and the latch is locked.
Check the lid gasket for any damage.
Why is the app constantly showing "Connection lost!" or "Offline"?
Wi-Fi signal could be weak. Try moving the grill closer to the router or the router closer to the grill, extending your wireless network, or connect to Bluetooth.
Angle the antenna on the back of the controller to point at the ground.
Try turning your grill controller off and on.
Try re-pairing your grill with your Wi-Fi network or Bluetooth device.
Technical Troubleshooting - Error Codes
Err: Main Temp Probe Malfunction
1. Check the connection of the main temperature probe. Unplug the connection, and then reconnect. Then, unplug the grill and plug back in.
2. If error code persists, you may need to replace your probe. Contact customer service using the chat box in the lower right corner.
ErH: Grill Temperature Exceeded 750°F
1. Unplug the grill power supply and open the lid to cool down.
2. Check for causes of the overheat.
• Grease Fire: Empty grease cup after each use.
• Fan Malfunction: See fan troubleshooting.
• Probe malfunction: Clean dirty probe.
3. Once grill has cooled, plug back in to clear message.
ErF: Fan Malfunction
1. Unplug the grill power supply.
2. Check the connection of the fan unit at both the controller and fan.
3. Check to make sure no ashes or debris are blocking the fan / stuck in the fan.
4. Plug the grill power supply back in.
5. If error persists, contact customer service using the chat box in the lower right corner.
ErU: Incorrect Voltage or Power Supply Failure
1. Only use the original included power supply or one of equal power (voltage and current output).
2. If error persists, contact customer service using the chat box in the lower right corner.
-
Troubleshooting
Got a question? We've got you covered.
-
Replacement Parts
Need a replacement part for your Char-Griller grill?
-
Warranty
View the warranty details of your Char-Griller grill.
-
Owner's Manuals
Need a product manual? They're here when you need them.
-
Product Registration
Register your Char-Griller product.
-
Contact Us
We're always around if you need help. Submit a request and we'll get you back up and running.

 Flat Iron® Portable 17-inch Gas Griddle
 Flat Iron® Premium Gas Griddle
 Flat Iron® Gas Griddle with Lid


 Sauced and No Sauce Spare Ribs
 Pulled Pork n' Bacon Cheesy Sliders
 Smoked Pulled Leg of Lamb
